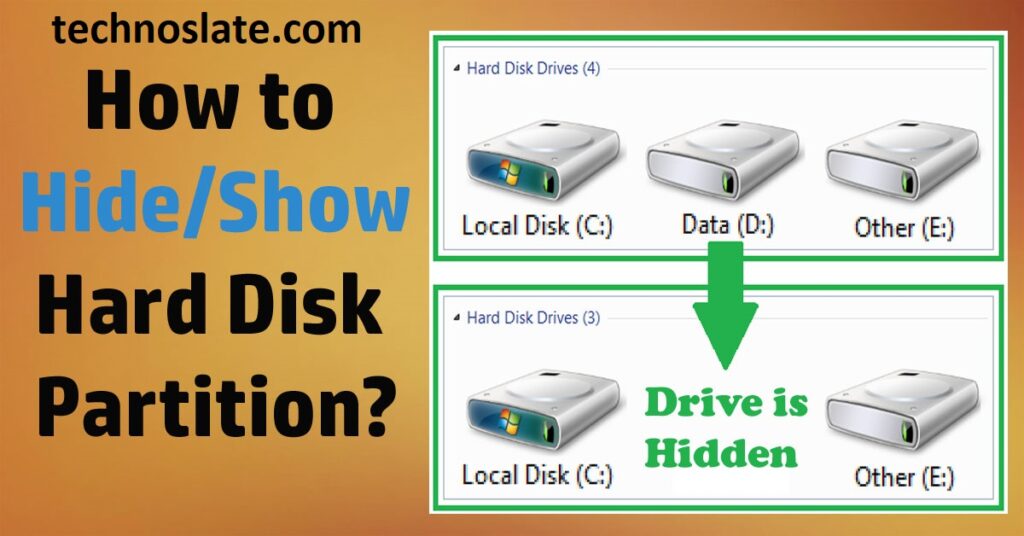
Hey friends, If you have Windows computers and devices with multiple partitions and drives, you may need to hide certain partitions. For example, many computer manufacturers create hidden recovery partitions on their devices. However, in certain situations, the recovery partition may appear in File Explorer or elsewhere on your device.
This can be useful when restoring your PC, but you may not always want to see it and may want to hide the recovery partition. If you need to easily access a hidden partition, you should unhide it as well. And Hiding drives and partitions has become an important topic for many users to prevent their data from being viewed or accidentally deleted.
I know you can hide files of any name or any size using file/folder properties. Unfortunately, this process can be time-consuming and frustrating if you need to hide a large number of files. But luckily, you can hide an entire drive partition in a minute or two. The hidden partition will not delete itself or delete any of your files, it will remain hidden until you make it visible again. We will use the Disk Management application to hide the disk partition.
This article introduces 2 workarounds to hide drives in Windows, including Disk Management and CMD. Each method has complete details and includes instructions to undo changes. Well, at least you can try it without worrying. Today we’ll hide a partition (or entire hard drive) in case you want to protect sensitive files from the prying eyes of casual users who might access your laptop (or desktop). It will still be visible in certain tools such as Disk Management, but it will not be visible in Explorer or various other programs.
Tip: For your information, there is a technical term used for showing/hiding a disk partition and that is Mounting/Dismounting a disk partition. Let’s see how to do this.
How to Hide a Disk Drive Partition – Disk Management Application
- First of all, close all open files in the partition you want to hide.
- Open the Disk Management application. If you don’t know how to open Disk Management, learn here. I have written an article on several ways to open Disk Management.
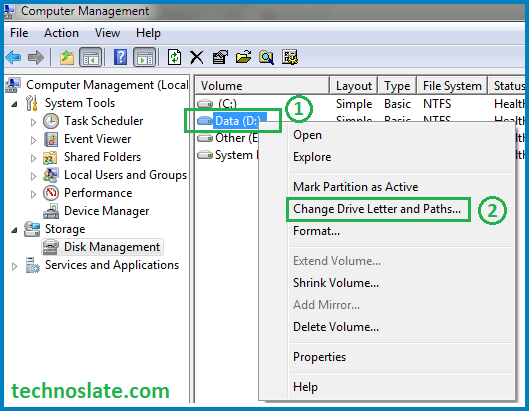
- Find the partition you want to hide from the list and then right click on the partition name (also called volume).
- Select Change Drive Letter and Path in the right click menu. A new window will open.
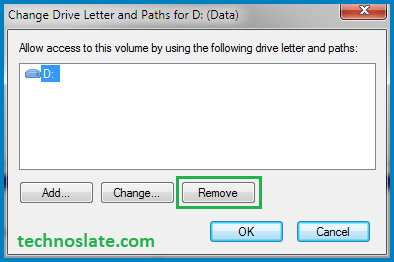
- Please confirm the partition name and then press the Remove button.
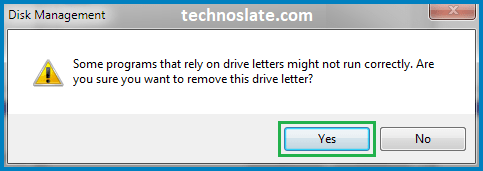
- You are asked to confirm that you want to delete the drive letter. Press Yes.
- The system will give you a warning message that your drive is in use. If you have closed all open files from the partition then you do not need to worry. Click OK.
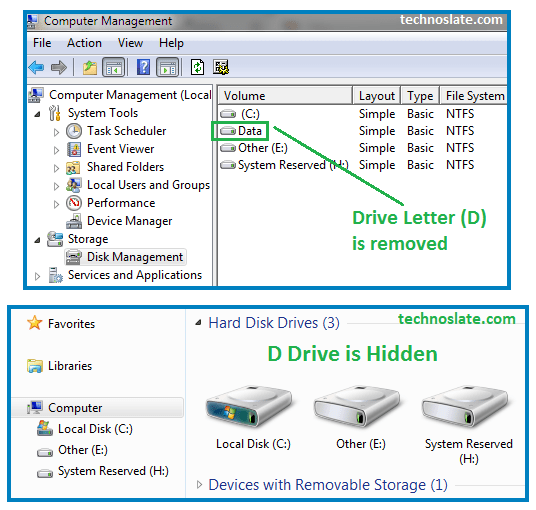
- Now, your partition is hidden and will not be visible in Windows Explorer or File Explorer. Please note that you cannot access any types of files on a drive you hide unless you make it visible.

How to Hide a Disk Drive Partition – Command Prompt
There are some limitations in working with disk management applications. If you cannot hide the drive partition with the Disk Management application, there is another option available to you and that is Command Prompt. Let’s hide a drive partition using the command prompt.
- First of all, close all open files in the partition you want to hide.
- Open a command prompt with administrator permissions. If you don’t know how to open command prompt with administrator permissions/rights, you should read the article here.
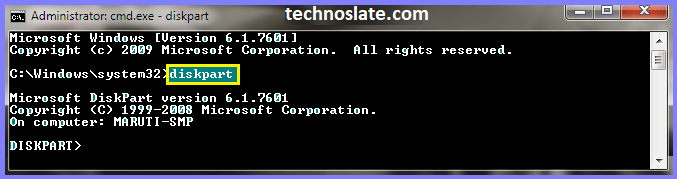
- Type diskpart and press Enter. Wait for a few seconds until you see DISKPART on the screen.
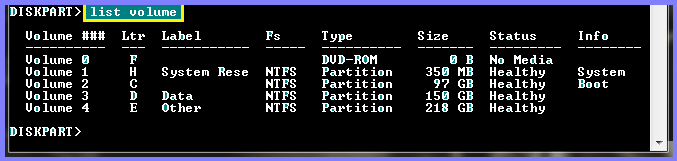
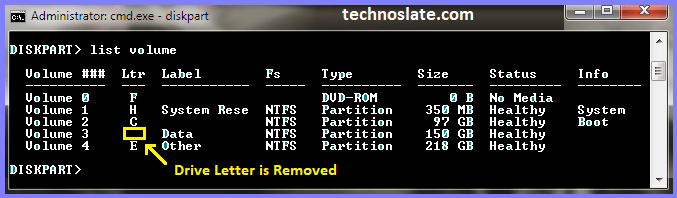
- Type list volume and press Enter. Find the partition you want to hide from the list.
- Find the volume number associated with your selected partition. You will need this in the next step.
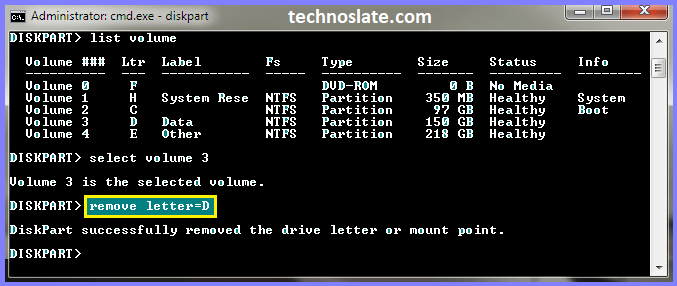
- Don’t forget to replace your volume number with * in this step. If your selected volume number is 1 then type select volume 1 and press enter.
- Find the drive letter of the partition you want to hide.
- Don’t forget to replace your drive letter with * in this step. Type remove letter=* and press enter.
- This will remove the drive letter and your drive partition is now hidden.
- You can check it in your Windows Explorer/File Explorer (My Computer/This PC). See image below.

How to Show/Unhide Disk Drive Partition – Disk Management Application
When you are ready to make the partition visible, you need to mount it in the system. Let’s do it.
- Open Disk Management.
- Find the partition you want to mount from the list.
- Right click on the partition name.
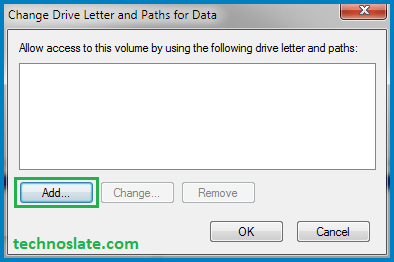
- Select Change Drive Letter and Path in the right click menu. A new window will open.
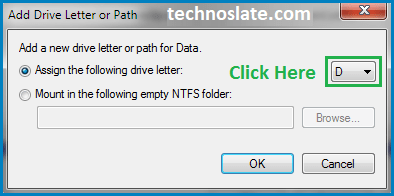
- Click on ADD button. A new window will open to select the drive letter.
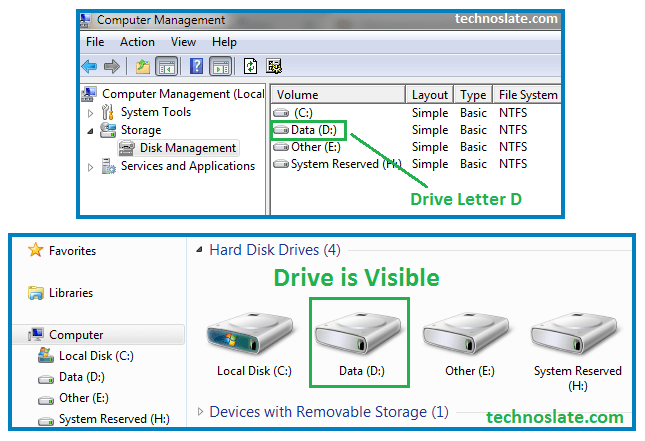
- Select the drive letter of your choice from the drop down list. Click OK. Upon clicking OK, the system will assign a new drive letter to the drive you previously removed.
- Dear reader, your drive is now mounted and you can access files from the drive.
How to Show/Unhide Disk Drive Partition – Command Prompt
- Open command prompt with administrator permissions.
- Type diskpart and hit enter. Wait for few seconds until you can see the DISKPART on the screen.
- Type list volume and hit enter.
- From the list, find the hidden partition you want to make visible/accessible. Confused? Let me tell you, if any volume has not a drive letter then the partition is hidden. Drive letter is just an alphabet character.
- Find the volume number associated with the selected hidden partition (a partition without alphabet character). You will need it in the next step.
- Don’t forget to replace your volume number with * in this step. If your selected volume number is 3 then Type select volume 3 and hit enter.
- Here, you can assign the drive letter of your choice. But, Don’t forget to replace your drive letter with * in this step. Type assign letter=* and hit the enter. It will assign the drive letter and your drive partition is now visible.
- Go ahead and access your files from Windows Explorer / File Explorer (My Computer/ This PC).

I hope this post can help you to hide/show a partition in windows. If you found this post helpful, please share this post with your friends and family. If you have any question in your mind or you are facing any problem then feel free to ask your question in the comment section. We will try our best to help you. You can read more such interesting articles here.
I really enjoyed this post, especially the part about batch file.
I don’t even know how I ended up here, but I thought this post was great.
I don’t know who you are but definitely you’re going to be a famous blogger if you are not already 😉 Cheers!
awesome tutorial 😎 🙏 straight to the point information
very informative dude
any child can understand your words for tech problems. thanks brother.
straight to the point information
awesome tutorial 😎 🙏
Thank you for this article. You don’t know how much it helped me!
This stuff still works in 2025.
This is the ONLY resolution for this problem that I can find.
This is incredible.
THANK YOU SO MUCH!!! I tried everything today and this has fixed my PC so I can finally install Windows.
good one
article thoda jaldi post kiya karo
Skillful Content Creator
very helping words, keep it on
It’s always worth it to read your article.
nice article