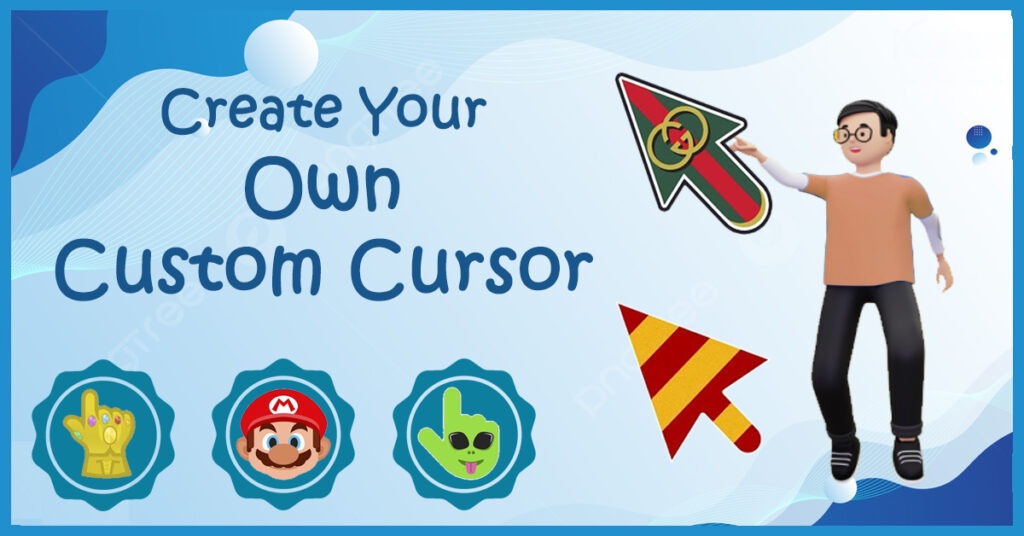
Did you know you can change your mouse arrows by using custom cursor? Yes, you can change mouse arrows, arrow size and arrow color as per your requirement. Mouse arrow is also known as pointer.
Change mouse cursor/pointer. We can change the mouse cursor very easily. But the point is, what if you want to use your custom cursor? Don’t worry. Here is the way.
There are many ways to create your own custom cursor, but here we’ll look at two. Let’s start step by step.
How to Create or Design a Custom Cursor Online?
To create an online cursor, you have to open the website named rw-designer.com and then go to the online cursor editor page. Or click here to open rw-designer.com.

On opening the web page given above you will find canvas on the page. There are many tools available for designing cursors such as…
- Canvas: To create/design a custom cursor of your choice.
- Pixel Mode: Choose your pixel mode with Blend Pixel or Replace Pixel.
- Toolbox: Pencil, eraser, shapes are available for your convenience.
- Effects: Set hue, saturation and dark shadow to the designed cursor.
- Templates: Ready to use pre-designed cursor templates.
- Color Picker: Choose your favorite color to make your cursor more colorful. You can also use color code. You are free to use multiple colors when designing the cursor.
- Color Shadow: Set your color with a mixture of black and white shadow. It is used to set the brightness of the cursor.
- Transparency Slider: Choose the transparency of the cursor.
- Preview: The preview box will show you what your cursor will look like.

After you are done with your work, just click on the Download button to save the cursor in your laptop/PC. I suggest you create a folder called cursors and put all your custom cursors in that folder to use it in the future.
How to Create a Custom Cursor from an Image?
In Windows, .cur is recognized as a cursor file. Without converting the image to a cursor file your image is not for use as is. Another option available is to create a custom cursor instead of dragging the cursor to the canvas. In this method, you can use your existing image to create a cursor.
Note: Before you use an image to convert it to a cursor, don’t forget to remove the white area from the image. Because this will make the cursor look bad. There are many applications and software available to remove white space from an image. Choose your favourite. It would be great if your image is in PNG format. Because PNG format supports greater bit depth and lossless compression.
To convert a image file into cursor file we are going to use a third party tool website known as convertio.
About Convertio: Convertio is an online file conversion utility. You can convert from one format to another, regardless of the file type. It has over 200 supported formats across multiple categories like video, audio, document, font, collection, vector, etc. You can select the file from your mobile, laptop/PC or upload from Google Drive, Dropbox or paste an image link from the internet. Open a convertio.co website from here. and please note that It doesn’t matter if you choose to use another website. Our objective is to convert an image to .cur.
- Open your favorite browser like Google Chrome, Mozilla Firefox, Opera, Safari etc. To convert your image to custom cursor file we need a file converter. If you have the software or application then proceed otherwise visit the convertio.co website.
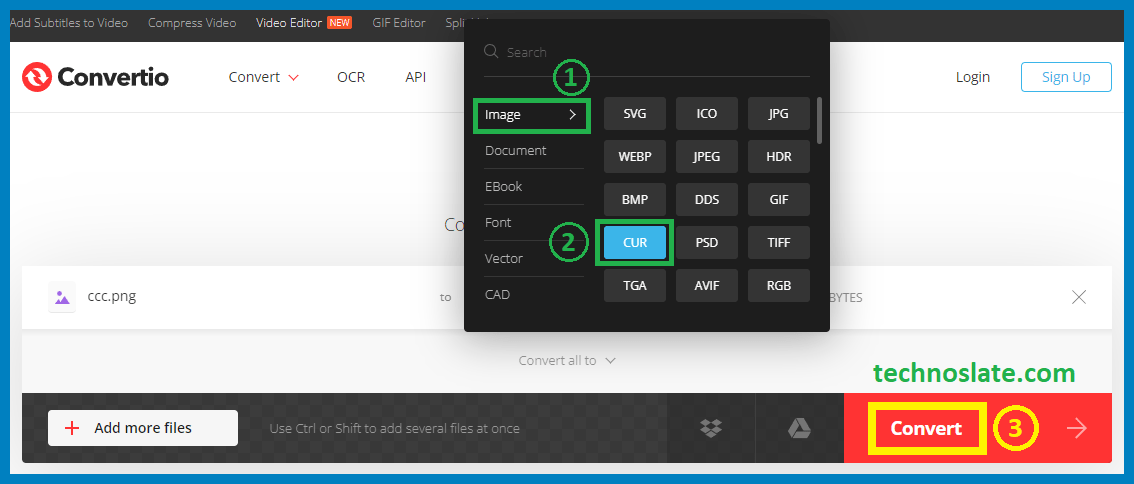
- Click on Choose Files to upload file from your device.
- Select/change your image format (PNG, JPG) in the first drop down list.
- Then select cur from Image category in the second drop down list. You can also select or upload multiple files. Click the Convert button.
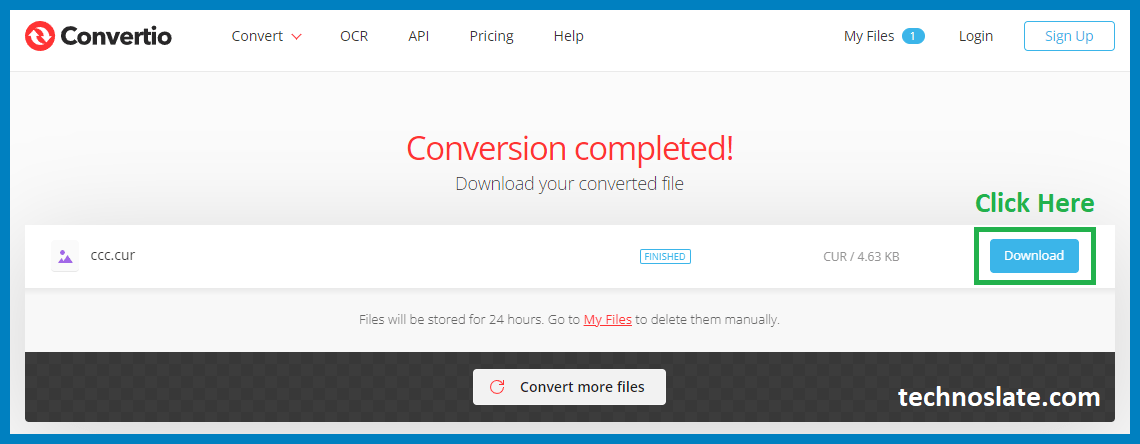
- After conversion of your file click Download to save the converted file to your device.


How to Change a Cursor in Windows?
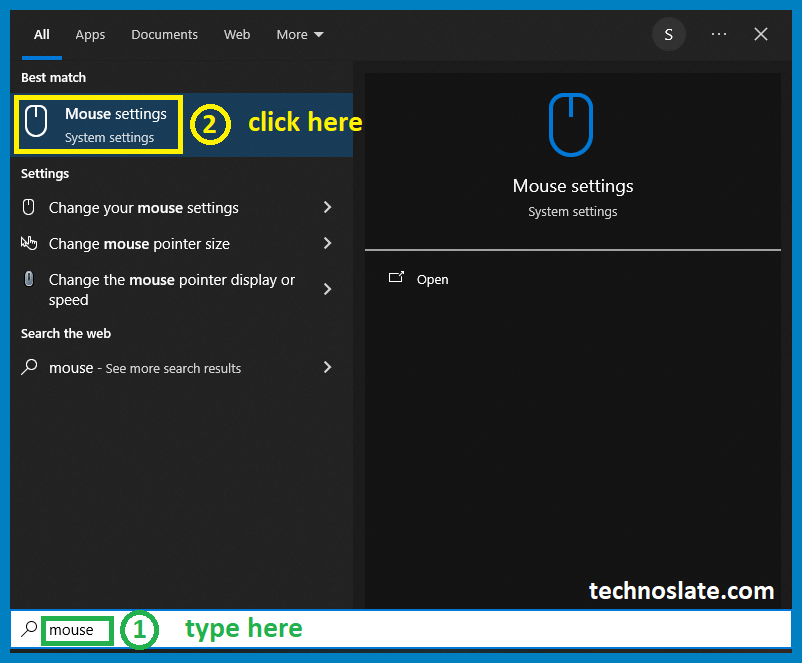
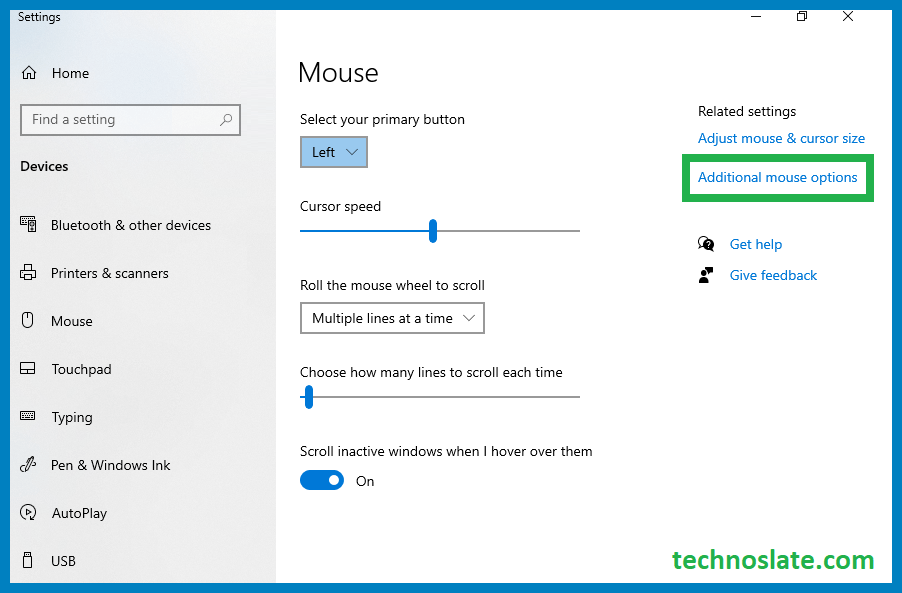
- Open the Start menu by clicking the Start button or pressing the Windows button on the keyboard. Type Mouse in the search box. You will see a list of mouse-related settings. Click the Mouse.
- Click on Additional mouse options.
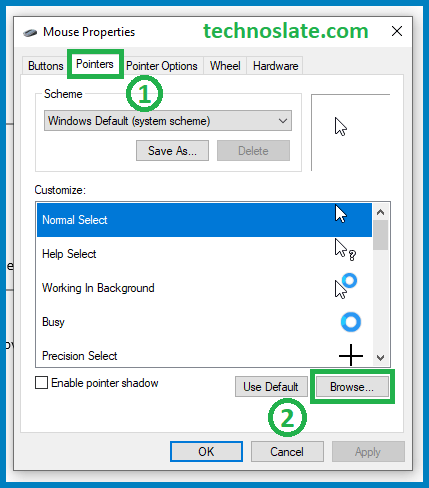
- Switch to the Pointers tab. Click Browse. This will open a dialog box to select your cursor file. Go to the location where your cursor file is saved (you converted it from an image).
- Select your cursor file and click Open. Please make sure that in the Customize section, the General selection is highlighted in blue.
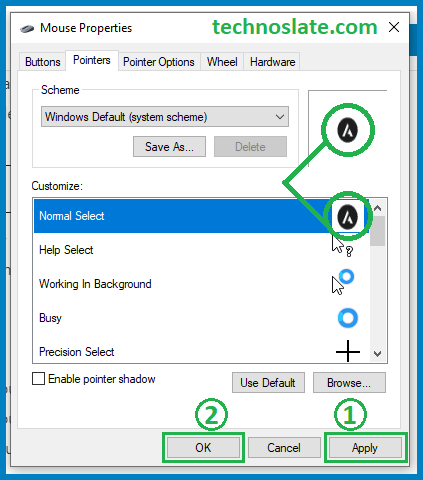
- Click Apply, and then click OK. You are done. Now, your cursor should changed.
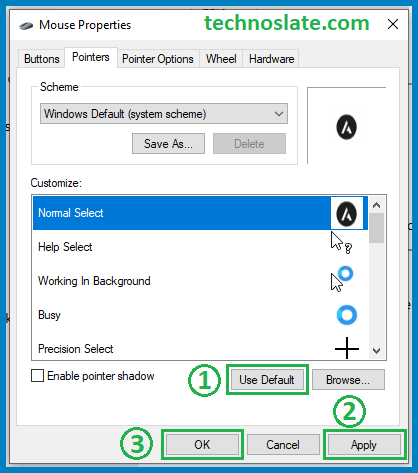
- If anything goes wrong or you want to reset old cursor as you default cursor then repeat the steps given above and just click on button Use Default. Then click on Apply and then OK.
Now, you know very well about how to create a custom cursor. If this post helped you then please share it with your friends and family to know about it. If you have any questions then feel free to ask in comment section. We will try our best to help you. You can read more such interesting articles here.
Informative article
Your blog is a true hidden gem on the internet. Your thoughtful analysis and engaging writing style set you apart from the crowd. Keep up the excellent work!
Thank you so much, it helped me alot!
Thanks for sharing your thoughts on this platform. Regards
got a sweet selection of posts