How to Increase Internet Speed by 20% in Windows…?
Today we are living in the fast world of internet. And every minute people keep looking for ways to increase internet speed on the internet. Except a few real methods, all the rest are nonsense and myths. One of those ways is to open up Windows’ reserved bandwidth. If the term Reservable Bandwidth is new to you, let’s understand it first.

Change the value of Reservable Bandwidth to 0 is a new way to increase internet speed in the internet world. Actually this is a concept, it is not a way to increase internet speed. Windows operating systems have a module called QoS Packet Scheduler and one of their features is Limit Reservable Bandwidth. Here, QoS stands for Quality of Service.
It is a traffic control module that controls the internet traffic of your device. Now this question might be coming in your mind that why does this module controls the traffic? So the answer is that it can use some internet for itself from the available bandwidth on your device. Now a question will again come to your mind that why would this module want to use the Internet for itself?
Your system has some high priority tasks scheduled that the system needs to complete in the background. This module is designed to reserve some amount of the available bandwidth to complete those high priority tasks. and this number is pre-fixed (20%) while the other 80% is always available.. For example, if you’re playing a game or streaming a movie online, your system may be downloading updates using that reserved bandwidth.
This means that no matter what your internet speed is, 20% of your internet bandwidth is reserved for system updates or for other high priority tasks. If you’ve already turned on system updates (automatically), you can also turn them off. So your system will never check for system updates. But this does not mean that your reserved bandwidth is free for you to use. No, it’s not. Your system will still use some amount of your internet to complete those high priority tasks.
However, if you choose to change the value of reserved bandwidth, you will need to change a setting known as Limit Reservable Bandwidth. To change this setting, you don’t need to purchase very costly softwares or need to learn very complicated system things. You can easily change the value by following the steps given below.
Steps to Increase Internet Speed by Unblocking Reserved Bandwidth
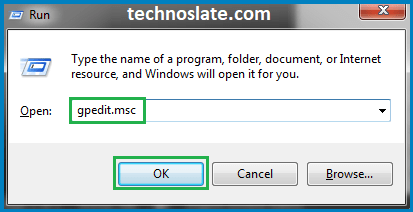
- Press Windows button + R simultaneously.
- Type gpedit.msc in the Run box and press Enter. This will open the Local Group Policy editor.
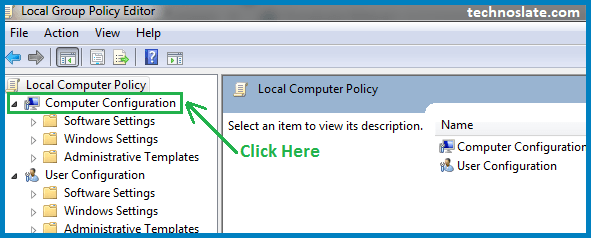
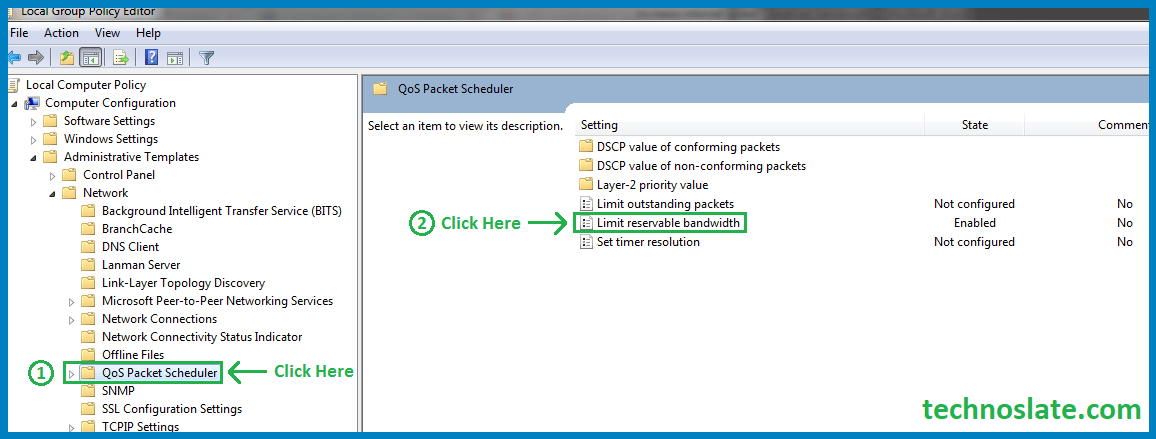
- Click Computer Configuration
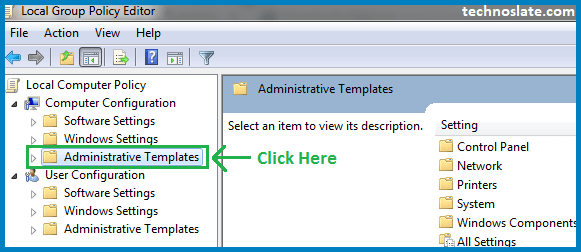
- Click on Administrative Templates
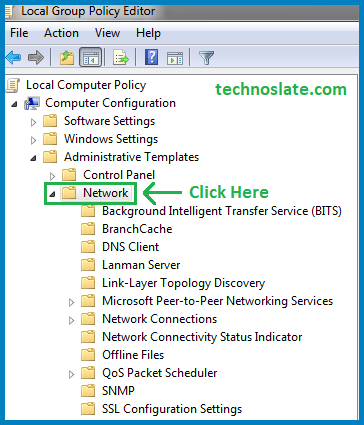
- Click on Network
- Click on QoS Packet Scheduler. FYI, here QoS stands for Quality of Service. This module is designed to regulate the network’s bandwidth.
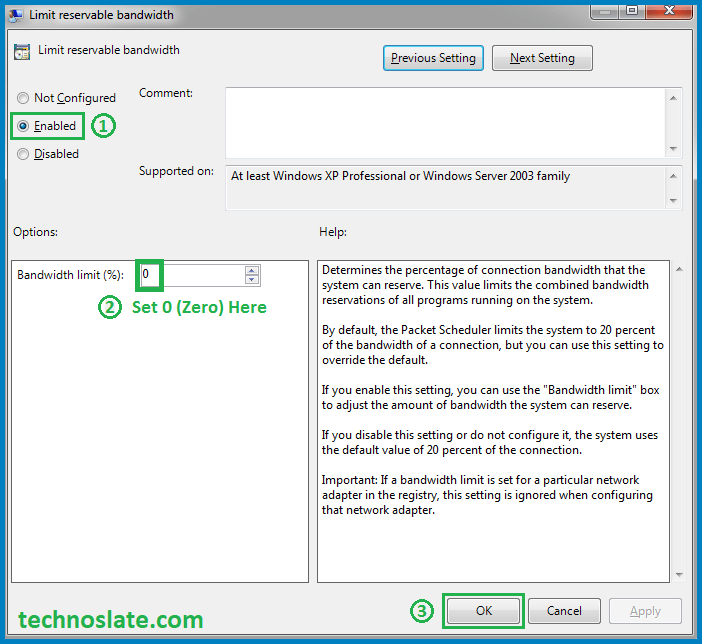
- Double click on Limit Reservable Bandwidth. Select Enabled on the left side of the window. Change the bandwidth limit (%) to 0 (zero)
- Click OK and close the window.
Wow, your work is done. Now, the bandwidth of your internet is usable for your requirement which was reserved at 20% by the window.
You can also increase internet speed by making some changes in your registry. The speed will not increase dramatically but it may make some changes for you.
Steps to Increase Internet Speed Using Registry Editor
- Press Windows button + R simultaneously. Type regedit in the Run box and press Enter. This will open the Registry Editor.
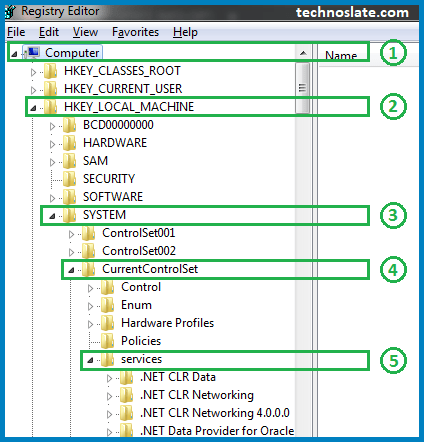
- Expand the Computer folder on the left side of the Registry Editor window. (See the image given below).
- Expand HKEY_LOCAL_MACHINE folder.
- Expand the System folder.
- Expand the CurrentControlSet folder.
- Expand the Services folder.
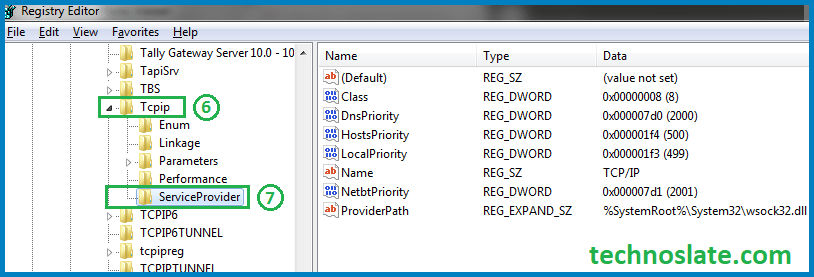
- Expand the TCPIP folder.
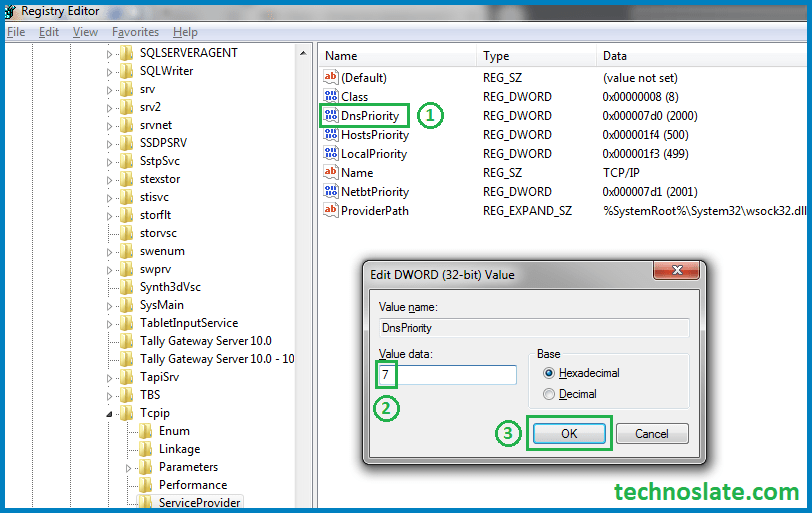
- Click on ServiceProvider folder.
- Set the values below on the registry files on the right side of the Registry Editor window.
- Double click on DnsPriority and type 7 in the Value data and click OK.
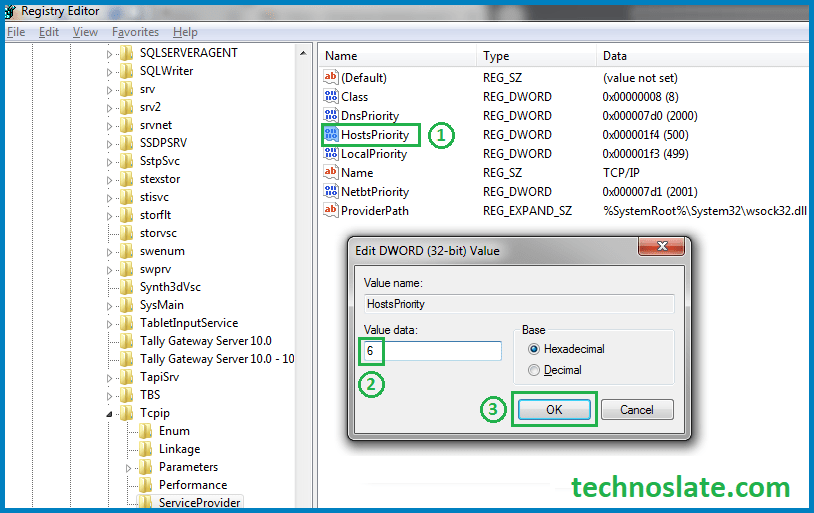
- Double click on HostsPriority and type 6 in the Value data and click OK.
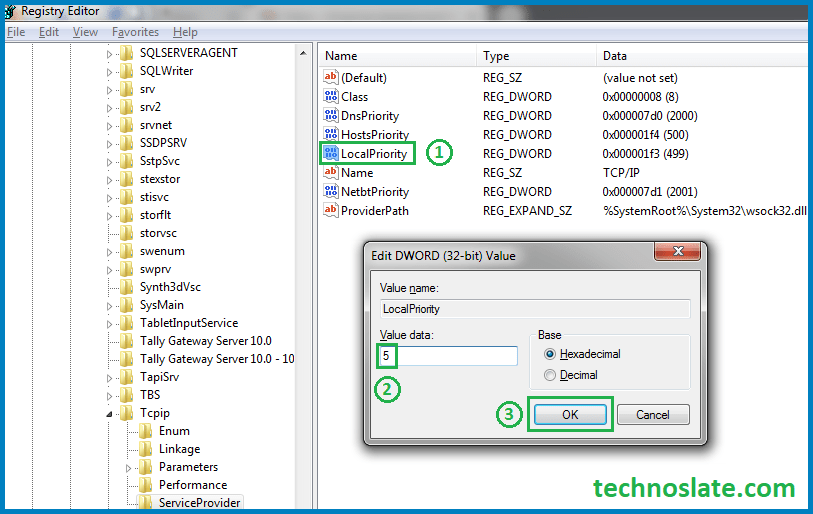
- Double click on LocalPriority and type 5 in the Value data and click on OK.
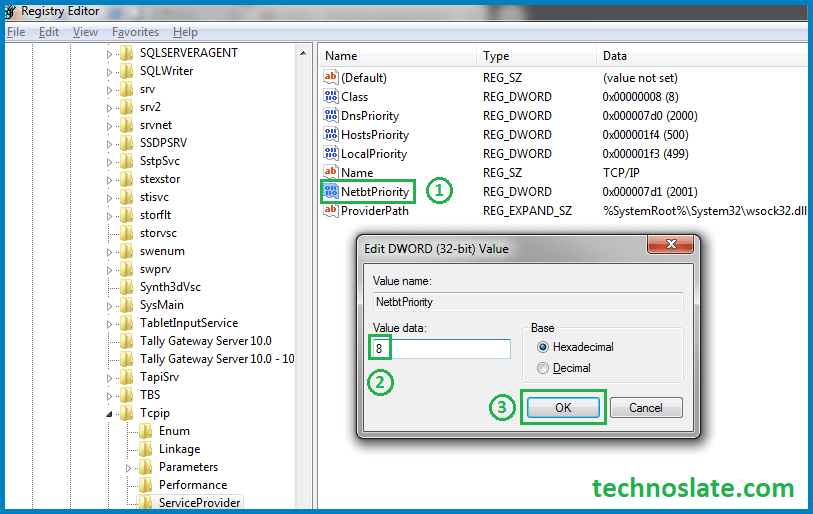
- Double click on NetbtPriority and type 8 in the value data and click OK.

Close the Registry Editor window. Wow, your work is done. Enjoy fast internet.
You will probably find many other websites that claim that setting this value to 0 will increase your internet speed up to 20% of the speed reserved by the system. In fact, the system never reserves Internet bandwidth except for high priority tasks.
Now, you know very well about how to increase internet speed by 20% in windows. If this post helped you then please share it with your friends and family to know about it. If you have any questions then feel free to ask in comment section. We will try our best to help you. You can read more such interesting articles here.